How to create custom Die-Cut Stickers for your brand (in 3 simple steps)
Behind the scenes of how Die-Cut Stickers are made
-
 The MOO Team
Share the post
Custom-shaped Stickers used to be the domain of brands with unlimited budgets. Not anymore. Thanks to advances in printing technology, Die-Cut Stickers are now within reach for businesses of all sizes, whether you’re running a record store in South London or scaling a SaaS platform.
We’re print experts who love what we do. Here’s how we make Die-Cut Stickers at MOO, from the moment you upload your design to final delivery.
Table of contents
- What are Die-Cut Stickers?
- How to create custom Die-Cut Stickers for your brand
- The design process
- Printing and manufacturing
- Quality checks and packaging
- Why choose custom-shaped Stickers?
Key takeaways:
- Die-cut Stickers let you break free from standard shapes
- Modern UV printing makes the process affordable and accessible
- Sustainable paper-based materials without compromising quality
- Human quality checks ensure your Stickers meet our standards
- Lower minimum orders mean you don’t need massive print runs
What are Die-Cut Stickers?

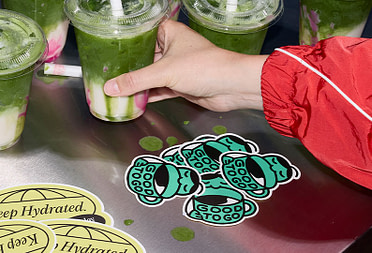
Unlike standard rectangular or circular stickers, Die-Cut Stickers are precisely cut to match the exact shape of your design. Your logo becomes a perfectly contoured sticker. They’re a powerful way to make your brand stick.
Take Dash the Henge, a record store in South London. They partner with artists to create limited edition Die-Cut Stickers, handing them out at events and adding them to customer orders. Simple touches that people actually keep. That’s the power of a shape that stands out.
3 Steps to creating custom Die-Cut Stickers
The Sticker manufacturing process has come a long way. What used to require expensive custom dies and massive minimum orders now happens with a few clicks. Here’s how the process works at MOO, from concept to delivery.
Step 1: design and setup

Turning artwork into Die-Cut Stickers is straightforward. Upload your design, and a rendered cutline is automatically generated as a preview. You’ll see exactly how your finished sticker will look before you commit.
The process is pretty seamless. Our system detects the edges based on the outer shapes of your artwork. If you’ve got a MOO Business Plan, you’ll also have access to a dedicated account manager and designer who can help refine your designs.
That last bit matters. Sometimes a second pair of eyes catches things that could make your Stickers easier to peel, faster to produce, or just plain better looking. Having design support built in means you’re not guessing.
Common mistakes and how to avoid them
The most frequent pitfall is overly intricate cutlines with lots of angles and sharp corners. They’re possible, but they increase production time and can make Stickers trickier to peel. Keep shapes clean and purposeful. Bold, distinctive silhouettes work better than fussy details.
It’s also worth noting that we automatically add a small border between your design and the cut line to keep everything precise. We cut around the outside of your design only. If there are any gaps or holes in your artwork, they’ll show the sticker backing. Design solid shapes for the cleanest results.
Step 2: printing and manufacturing

Once your artwork passes through our automated preflight system – outlining fonts, checking resolution – it moves to production. This is where technology makes affordable Die-Cut Stickers possible.
MOO uses Roland UV printers paired with Summa cutters, which means we can handle complex designs with precision.
“All of our printers are color-calibrated using a spectrophotometer,” says Meighan, our Prepress Technician. “So your colors stay consistent across the entire print run.”
For Metallic Stickers (available in both Gold and Silver), the software creates a white layer beneath the colored artwork, giving those finishes their signature pop.

The printing happens on your choice of premium materials – Matte Paper, Coated Paper, or Metallic. Our Matte and Coated Paper options are both recyclable, which sets us apart in the custom-shaped Stickers world.
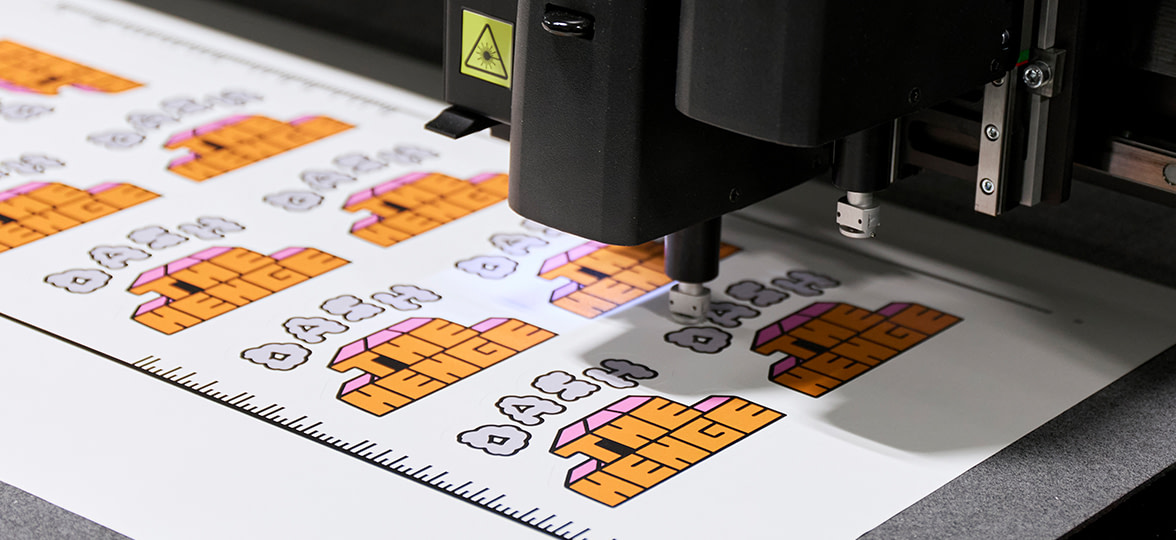
How the cutting process works
The actual cutting process is where precision matters most. After printing, the machine reads barcodes to determine the cutline shape and begins cutting. The cutter advances the Stickers into a catch basket, where operators gather, jog, and prep them for packaging. It’s a balance of automation and hands-on attention.
Step 3: quality checks and packaging
We rely on workflow automation for efficiency, but human oversight is crucial.

“Operators are responsible for flagging poor quality Stickers to our customer service and design teams,” Meighan explains. It’s a balance that means your Stickers get proper attention without slowing things down.
Die-cut Stickers come as singles (not on rolls), which makes them perfect for events, mailouts, and welcome packs. Smaller orders are stacked in glassine envelopes and sealed with a MOO Sticker before going into protective padded mailers. Larger orders are carefully boxed for transit and are sealed with a signature “yay” sticker.
Why choose custom-shaped Stickers?
From guerrilla marketing campaigns to global brand stories, Die-Cut Stickers work harder than standard shapes. Whether you’re partnering with artists for limited editions like Dash the Henge or telling your brand story in bite-sized form, Die-Cut Stickers offer visibility that people actually notice.
And here’s the thing: you don’t need massive production runs anymore. At MOO, you can start with just 10 units. That means custom-shaped Stickers are finally accessible for brands at any stage – first print job or millionth order, we’ve got your back.
Go beyond the rectangle with MOO
Explore our Die-Cut Sticker options and start creating shapes that capture attention.
Need help with your artwork or planning a larger order? MOO Business Services gives you access to dedicated design support and account management. Fill in this simple form, and one of our team members will be in touch shortly.
Keep in touch
Get design inspiration, business tips and special offers straight to your inbox with our MOOsletter, out every two weeks.
Share the post
Keep in touch
Get design inspiration, business tips and special offers straight to your inbox with our MOOsletter, out every two weeks.